
How to Install a Roof: Step-by-Step Guide for Homeowners
A roof does more than cover your home. It protects your family, adds beauty, and improves your home’s value. Knowing how to install a roof helps homeowners make smart decisions, whether they plan to handle small tasks or hire professionals.
This guide explains each step of the roof installation process, including choosing materials, placing underlayment, and setting shingles. You will also learn key safety tips and common mistakes to avoid.
Step 1: Prepare the Roof Deck
The first stage in learning how to install a roof is getting the surface ready. A clean and solid roof deck ensures that the installation lasts for years.
- Remove old materials such as shingles, nails, and flashing.
- Inspect the wood decking for signs of water damage or rot. Replace any weak areas.
- Install drip edge flashing along the eaves to direct water away from the structure.
Work carefully and use proper safety gear. If the deck shows serious wear, our roof installation team in Pelion, SC can replace it quickly and correctly.
Step 2: Choose the Right Roofing Materials
The next part of the roof installation guide focuses on materials. The right choice depends on your budget, home style, and climate.
- Asphalt shingles: Affordable, durable, and popular for most homes in Pelion, SC.
- Metal roofing: Long-lasting and energy-efficient, ideal for large homes or buildings.
- TPO roofing: Great for flat or low-slope commercial properties.
If you want strong and stylish results, visit our asphalt shingle roofing page to see reliable material options.
Step 3: Install the Underlayment
Underlayment protects your roof deck from moisture and helps prevent leaks.
- Start at the bottom and roll out the underlayment horizontally.
- Overlap each row by four inches to create a watertight seal.
- Secure it with nails or staples following manufacturer directions.
- Add an ice and water barrier in valleys or around edges for extra protection.
Underlayment forms the base for a durable and leak-resistant roof.
Step 4: Apply Starter Shingles
Starter shingles create a solid foundation for the main shingle rows. They also prevent water from seeping under the edges.
- Place starter shingles along the drip edge.
- Make sure the adhesive strip faces upward.
- Nail them securely before moving on to the first course.
Taking time here ensures that later rows align correctly and stay sealed during heavy rain.
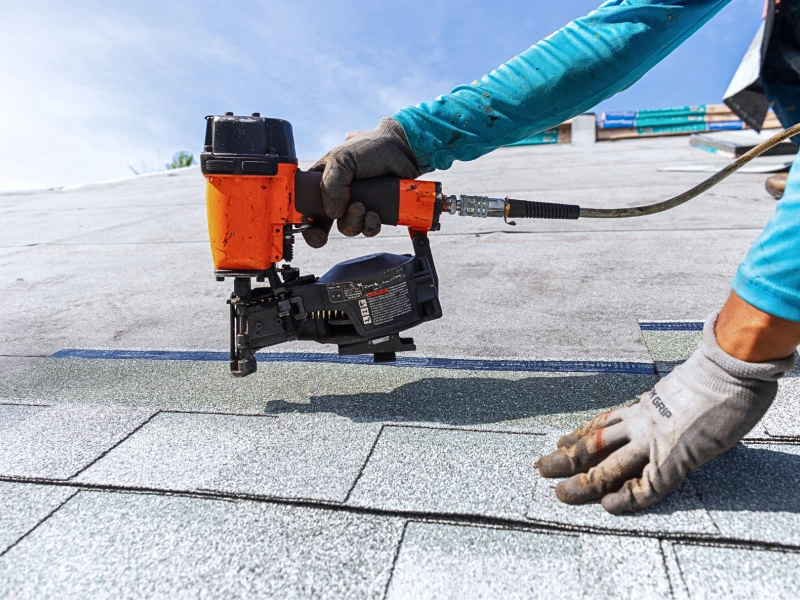
Step 5: Install Shingles or Roof Panels
This is the most detailed part of how to put on a roof. Proper placement and patterning make all the difference.
For Asphalt Shingles
- Begin at the lower edge.
- Overlap each new row by half a shingle’s height.
- Stagger the seams to prevent leaks.
- Nail each shingle one inch above the cutouts using four nails per piece.
For Metal Roofing Panels
- Start from one side and move across the roof.
- Fasten panels with screws along ridges and edges.
- Seal joints and overlaps with closure strips for weather resistance.
Our residential roofing crew can handle installation quickly and safely, especially on steep or complex roofs.
Step 6: Add Flashing Around Vents and Chimneys
Flashing is key to preventing water from entering around roof openings.
- Use step flashing where the roof meets side walls.
- Install continuous flashing around chimneys and valleys.
- Seal all gaps with roofing cement or caulk.
Skipping flashing is a common DIY mistake that leads to leaks later. Always double-check that flashing lies flat and tight.
Step 7: Install Ridge Caps and Vents
Ridge caps finish the roof and protect its top seam. Ridge vents allow heat and moisture to escape from the attic, extending roof life.
Install ridge caps along the peak, overlapping each one to form a clean line. Then attach ridge vents beneath them for balanced airflow.
Proper ventilation reduces energy costs and keeps your attic dry year-round.
Step 8: Final Inspection and Cleanup
After installation, walk the roof carefully and inspect every area.
- Check for missing nails, uneven rows, or loose shingles.
- Clean up leftover materials and nails.
- Clear gutters of debris and shingle granules.
This step ensures your roof looks neat and performs well from day one.
Common DIY Roofing Mistakes
Even confident homeowners make errors during DIY roof installation. Here are a few to avoid:
- Not using enough nails or placing them too high on shingles.
- Forgetting flashing or drip edges around problem areas.
- Poor attic ventilation that leads to trapped heat and moisture.
- Choosing materials that don’t suit the local weather.
If you feel unsure about any part of the roof installation process, contact our skilled team for help with roof leak repair or full replacements.
Roofing Safety Tips for Homeowners
Working on a roof can be dangerous without proper safety measures.
- Avoid working in wet or windy conditions.
- Wear shoes with strong grip and gloves for better control.
- Use a secure ladder and always have someone nearby.
- Keep tools organized and within easy reach.
Safety always comes first, especially when learning how to install a roof for the first time.
When to Hire a Professional Team
While some homeowners like the challenge of DIY roof installation, others prefer a trained crew to handle complex or large projects.
Our team in Pelion, SC has the experience, equipment, and precision to complete every job efficiently. Whether you need roof installation, gutter work, or siding upgrades, we provide quality and care from start to finish.
We also handle window replacement and roof leak repair, giving you a full solution for home protection.
Conclusion
Understanding how to install a roof helps you appreciate the time, skill, and care that go into every layer. From preparing the deck to nailing shingles and sealing vents, every detail matters.
Even with this guide, roofing requires training and proper safety measures. If you want lasting protection and reliable results, trust a local team that values quality craftsmanship.
Why Choose Resilient Roofing & Repair
At Resilient Roofing & Repair, we combine years of experience with high-quality tools and dependable materials. Our team handles residential roofing, commercial roofing, and roof installation throughout Pelion, SC.
We take pride in solid workmanship, clear communication, and durable results. Call (803) 201-1759 to schedule your free estimate and discover why homeowners across Pelion rely on us for trusted roofing solutions.